
How to Hold a Chinese Calligraphy Brush: The Grip and Your First Strokes
Every elegant Chinese name written with a brush starts with the same two skills: a correct grip and two simple strokes. This walkthrough follows a beginner calligraphy lesson frame by frame — from laying out the four treasures, through the exact finger positions of the brush grip, to drawing the horizontal and vertical strokes that make up the character shí (ten). Follow along and your written name will already look more confident.
Key takeaways
- Calligraphy needs only four tools: inkstone, ink, brush, and paper — the wén fáng sì bǎo, or four treasures of the study.
- Keep the brush shaft vertical; the writing hand sits under the brush with the palm facing in before closing the grip.
- Clamp the shaft with the middle and ring fingers, then let the index finger and thumb rest naturally against it.
- Grip just firmly enough that the brush cannot slip — squeezing it kills the fine movements.
- Use the tip of the bristles, not the belly, so strokes stay thin and fine.
- The horizontal stroke has three phases (landing, dragging, finishing); the vertical has two and ends in a sharp hanging-needle taper.
From grip to first characters, step by step
- 1
Lay out the four treasures
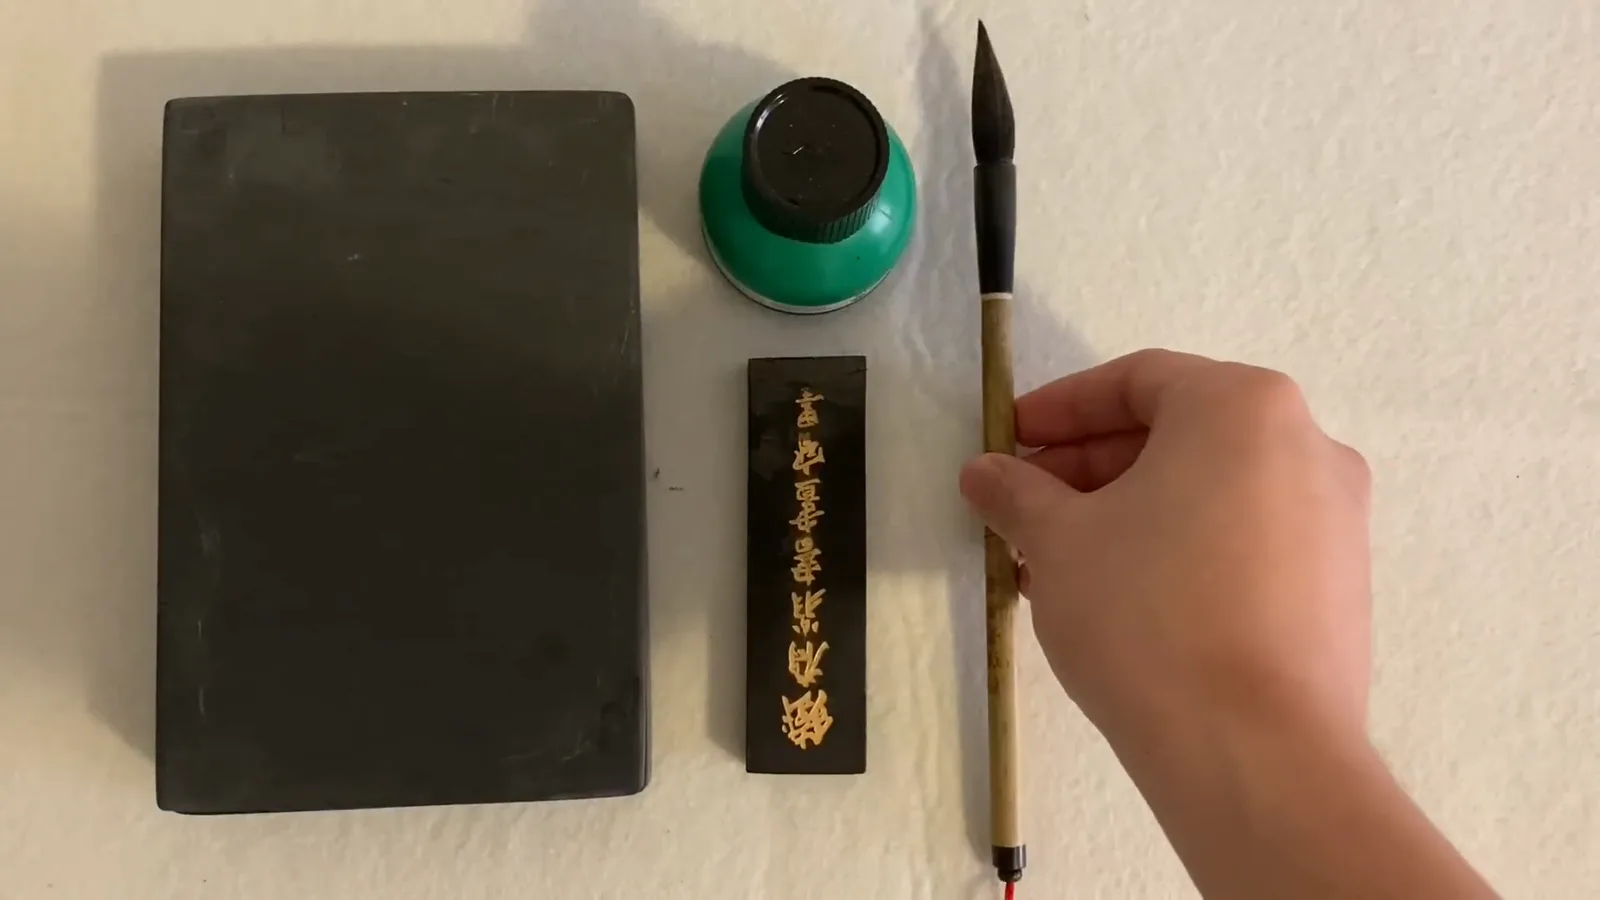
You need exactly four things: a stone inkstone (yàn) to hold ink, ink itself — either a solid ink stick (mó) ground with water or a ready-made bottle — a brush (bǐ), here a mid-size wolf-hair brush, and absorbent rice paper (zhǐ). The Chinese call this starter kit wén fáng sì bǎo, the four treasures of the study. Nothing else is required to write your name.
Inkstone, bottled ink, ink stick, and brush — the starter kit for calligraphy.Watch at 0:48 - 2
Hold the brush vertical before you grip it
The single most repeated rule in the lesson: the brush shaft stays vertical, perpendicular to the paper. A good way to get there is to hold the top end of the brush with your free hand while your writing hand slides underneath it, palm facing in. Only after the shaft stands upright do you close your fingers around it.
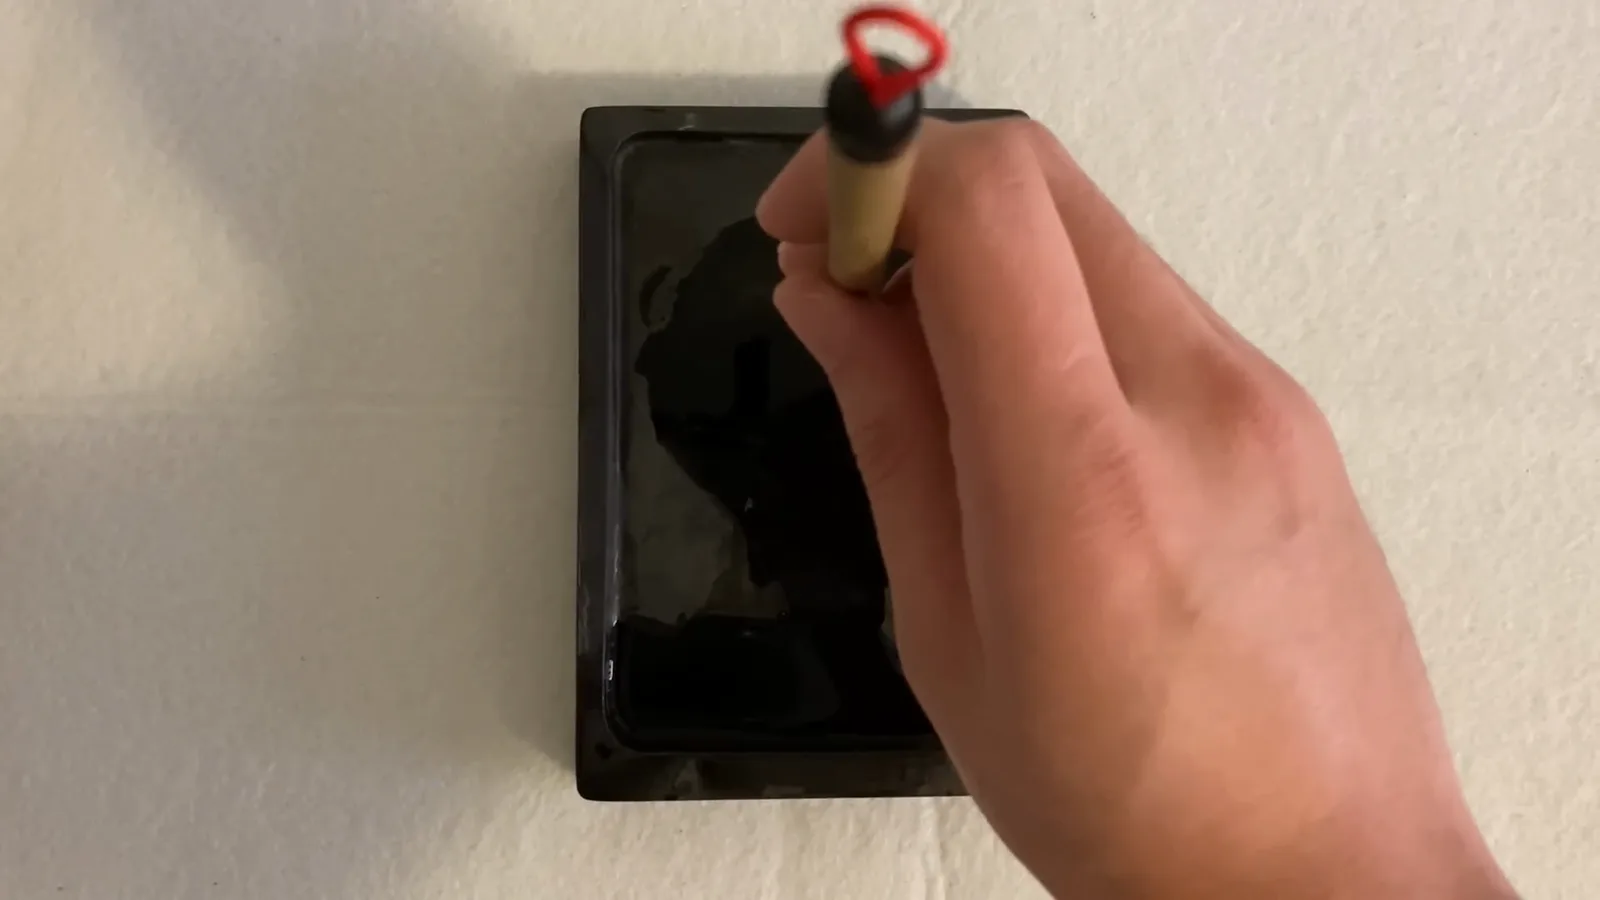
The brush stands upright before the fingers close into the grip.Watch at 2:30 - 3
Clamp the shaft with your middle and ring fingers
Align the top knuckle of your middle finger with the body of the brush, then clamp the shaft between your middle and ring fingers. These two fingers do the holding; the rest of the hand stays relaxed. Feel free to pause and copy the gesture until it feels stable.
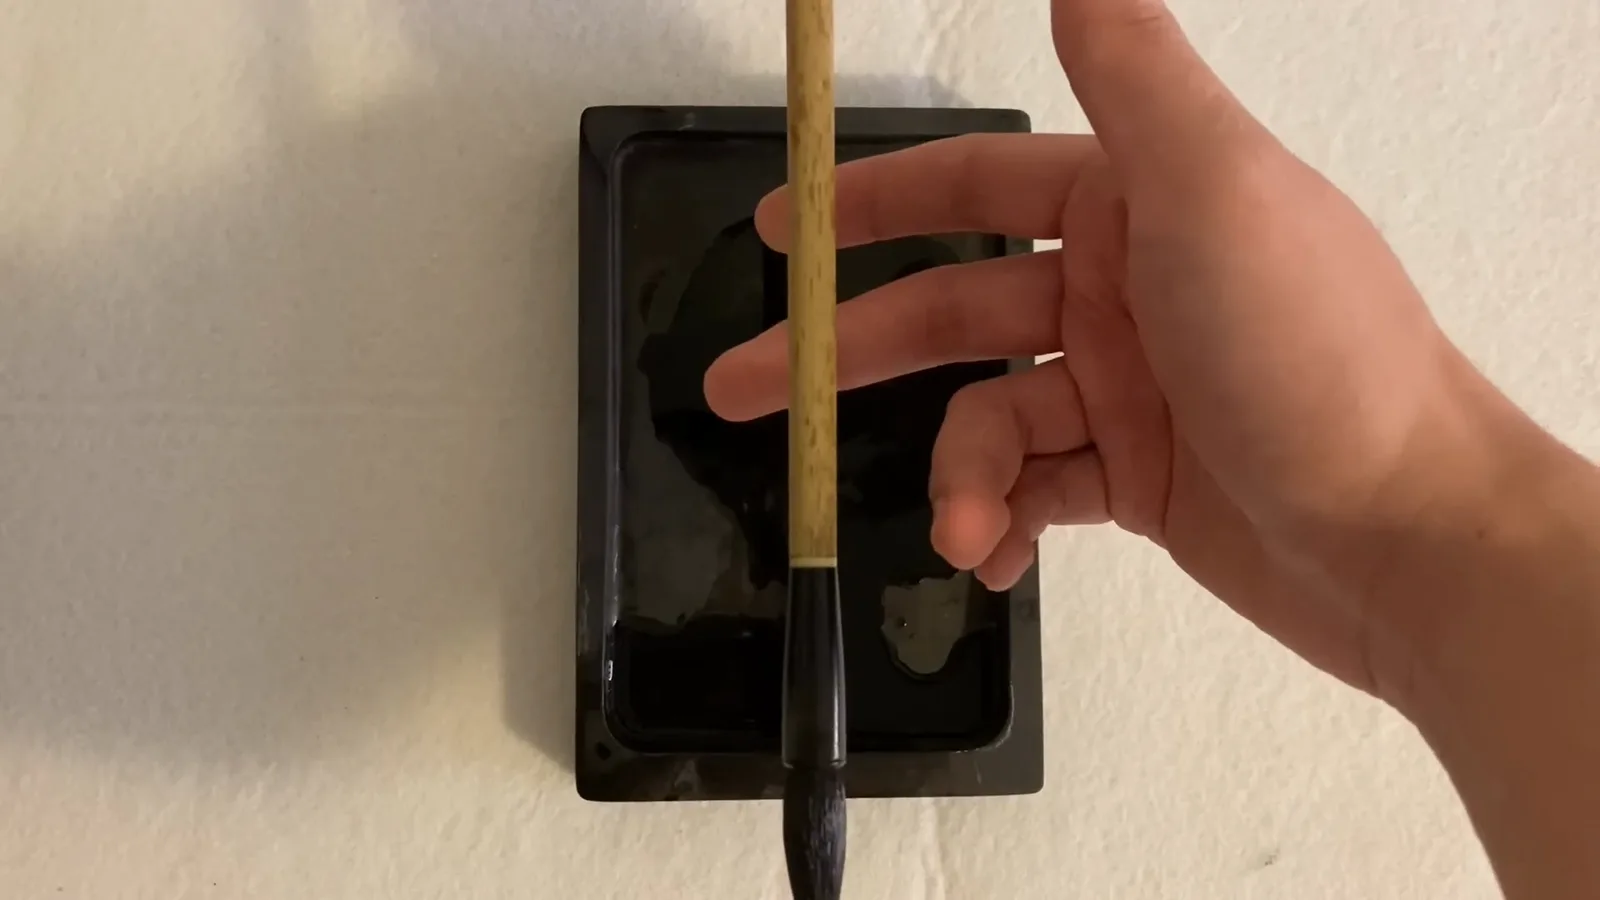
The middle and ring fingers carry the brush; the hand stays loose.Watch at 2:52 - 4
Close the grip with thumb and index finger
Let the index finger and thumb attach naturally to the shaft from the other sides — no extra force. Grip just firmly enough that the brush cannot slip out of your fingers. Squeezing harder only stiffens your wrist and ruins the subtle pressure changes that calligraphy depends on.
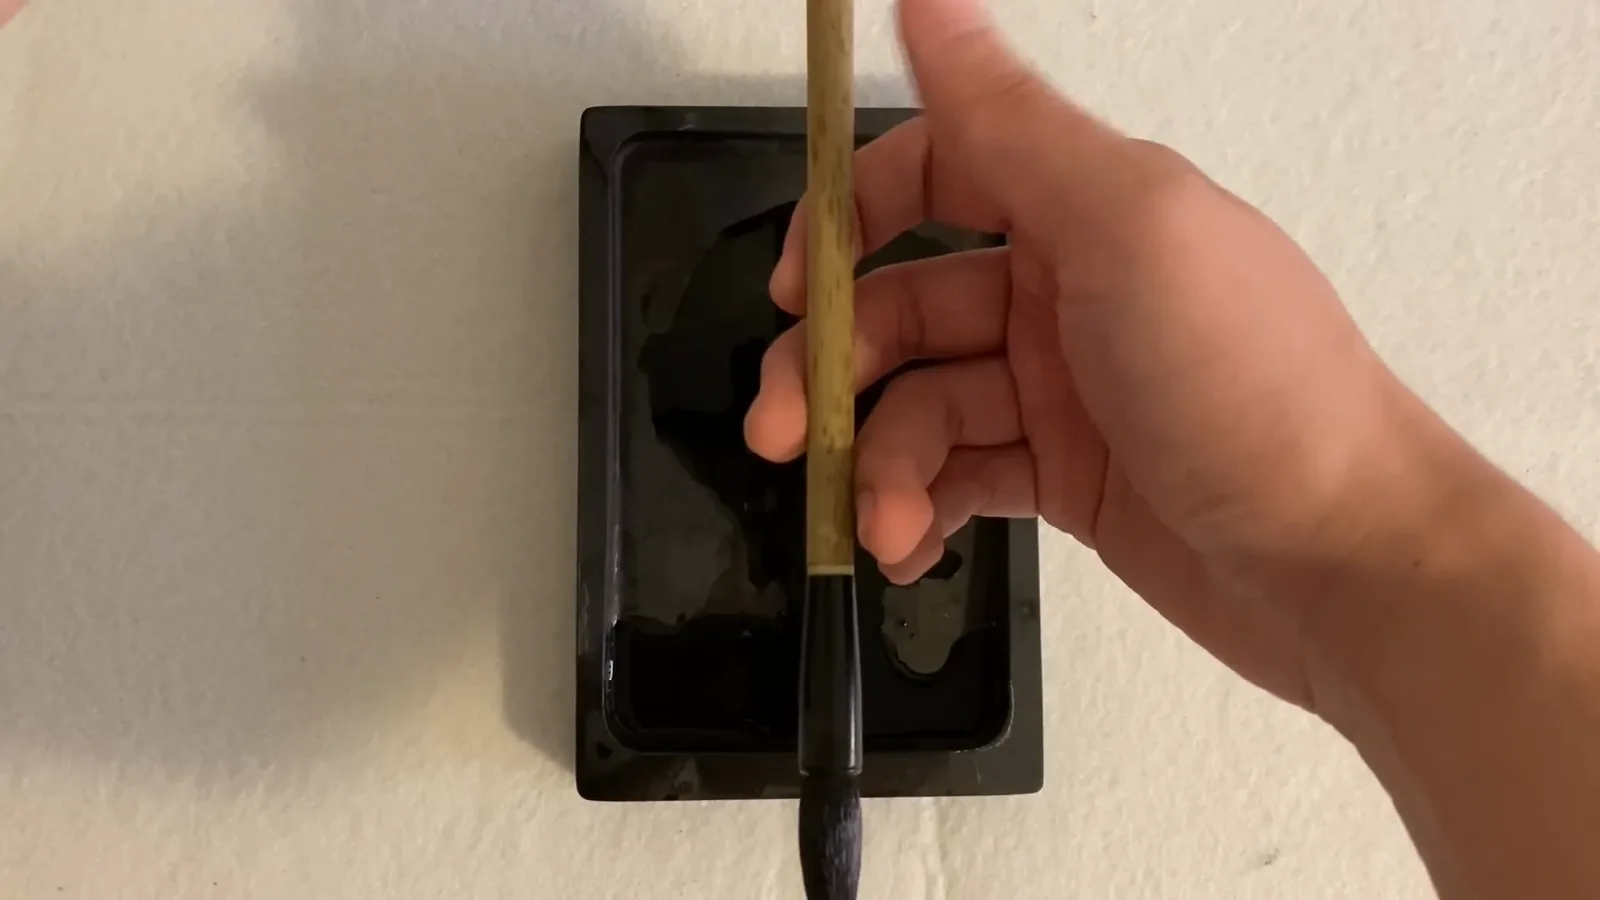
Thumb and index complete the grip — firm enough, never tight.Watch at 2:56 - 5
Soak the brush with ink properly
Dip the brush into the ink and flip it over a few times so the bristles soak it up evenly — the center of the brush should never stay dry. When the brush is loaded, scrape the excess off against the edge of the inkstone; otherwise ink drips run down onto your paper and blot the first stroke.
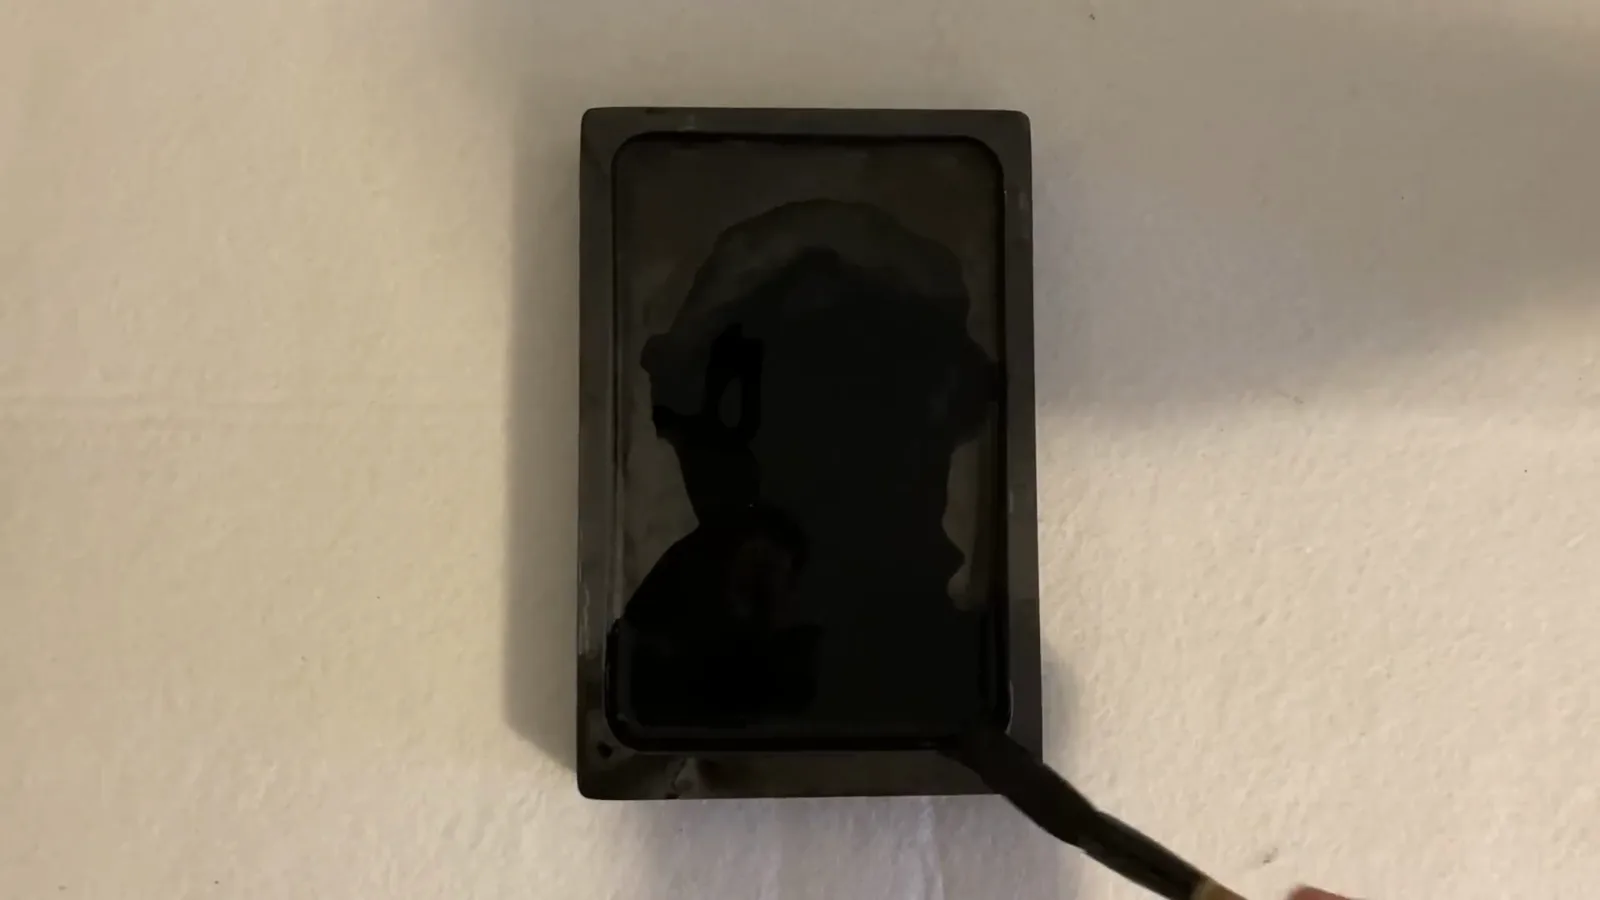
Flip the brush in the ink, then scrape the excess on the inkstone edge.Watch at 3:16 - 6
Draw your first horizontal stroke
Sit up straight, keep your body stable, dip and scrape the brush once more, then breathe out and start: a single horizontal stroke, moving left to right. Keep the brush vertical the whole way and let the tip of the bristles do the work — this style of calligraphy lives on thin, fine lines.
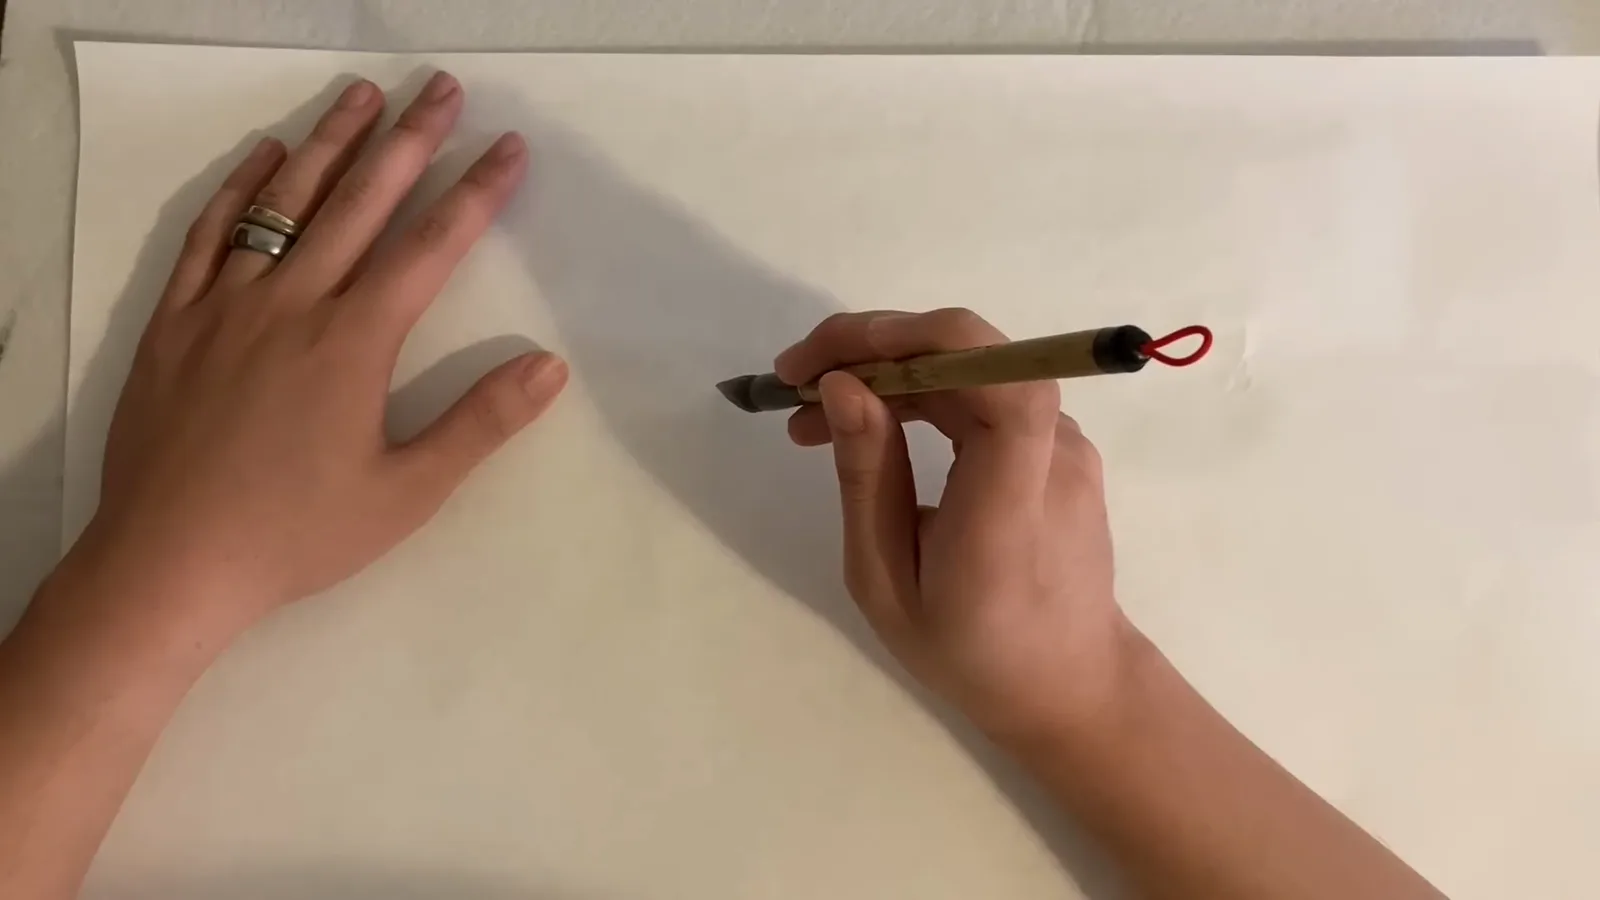
The first héng stroke — left to right, brush upright, tip leading.Watch at 4:24 - 7
Cross it with a vertical — you wrote shí, the number ten
Add one vertical stroke across the middle of your horizontal and you have written a real character: shí, the number ten. It is only a cross of the two basic strokes, yet it already shows whether your brush stayed upright and the lines stayed even — an honest first test for writing any name.
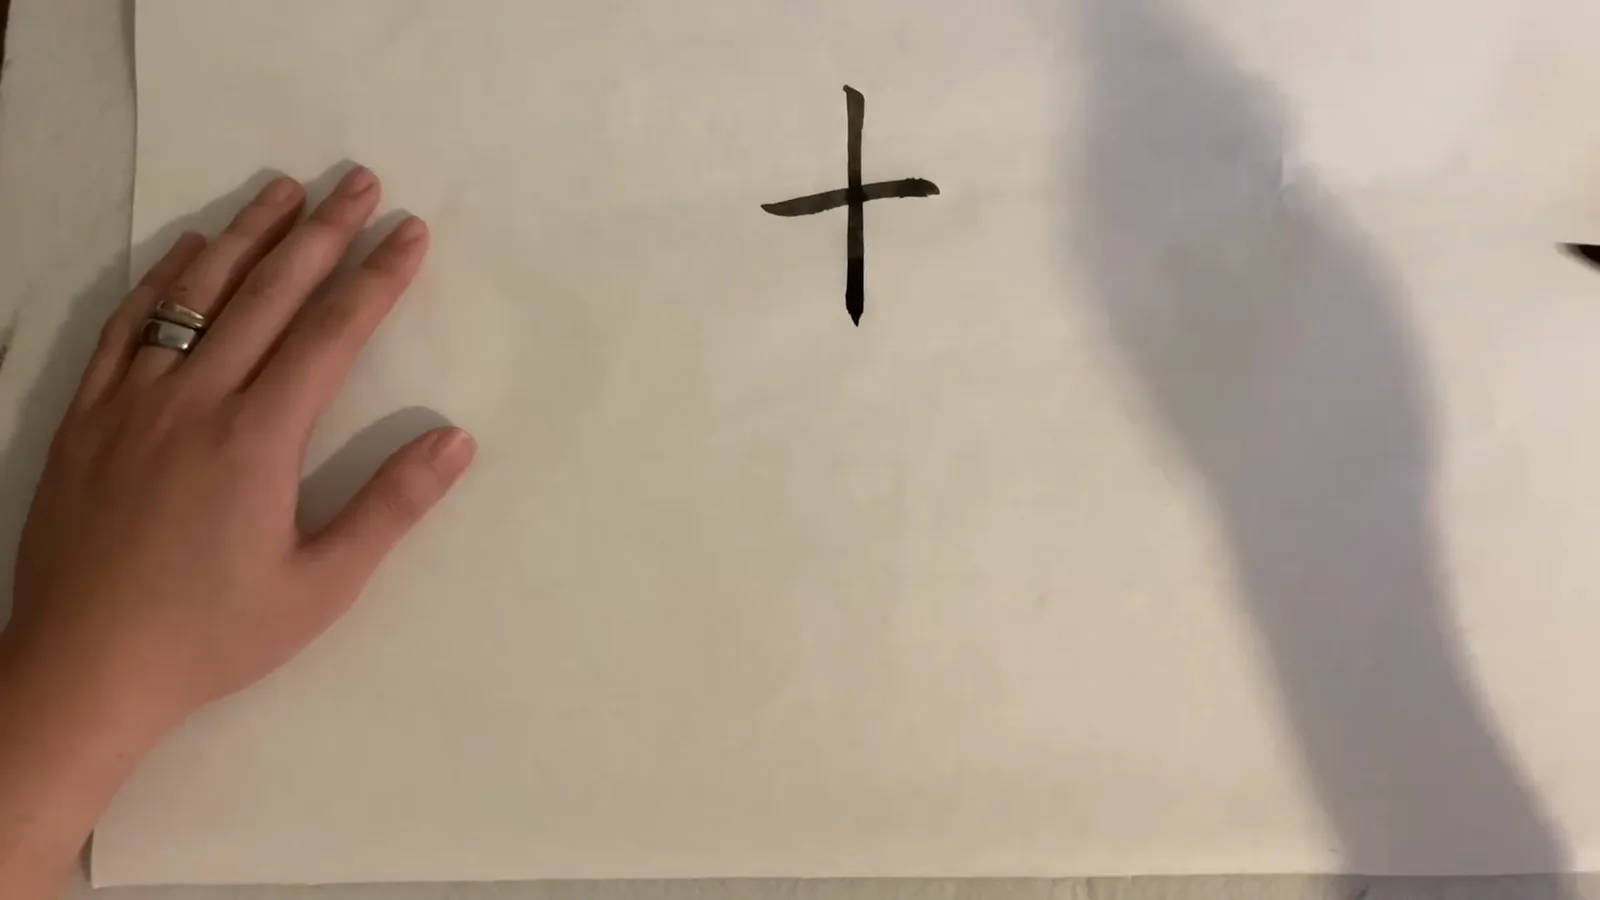
One horizontal plus one vertical: the character shí, ten.Watch at 5:00 - 8
The horizontal stroke has three phases
A good horizontal is not one motion but three: landing (press the tip down), dragging (move across with even pressure), and finishing (lift, press down again, and hook back a little). The pressure changes are subtle — if they show too much, the stroke looks rough. Aim for smooth transitions, especially at the start and the end.
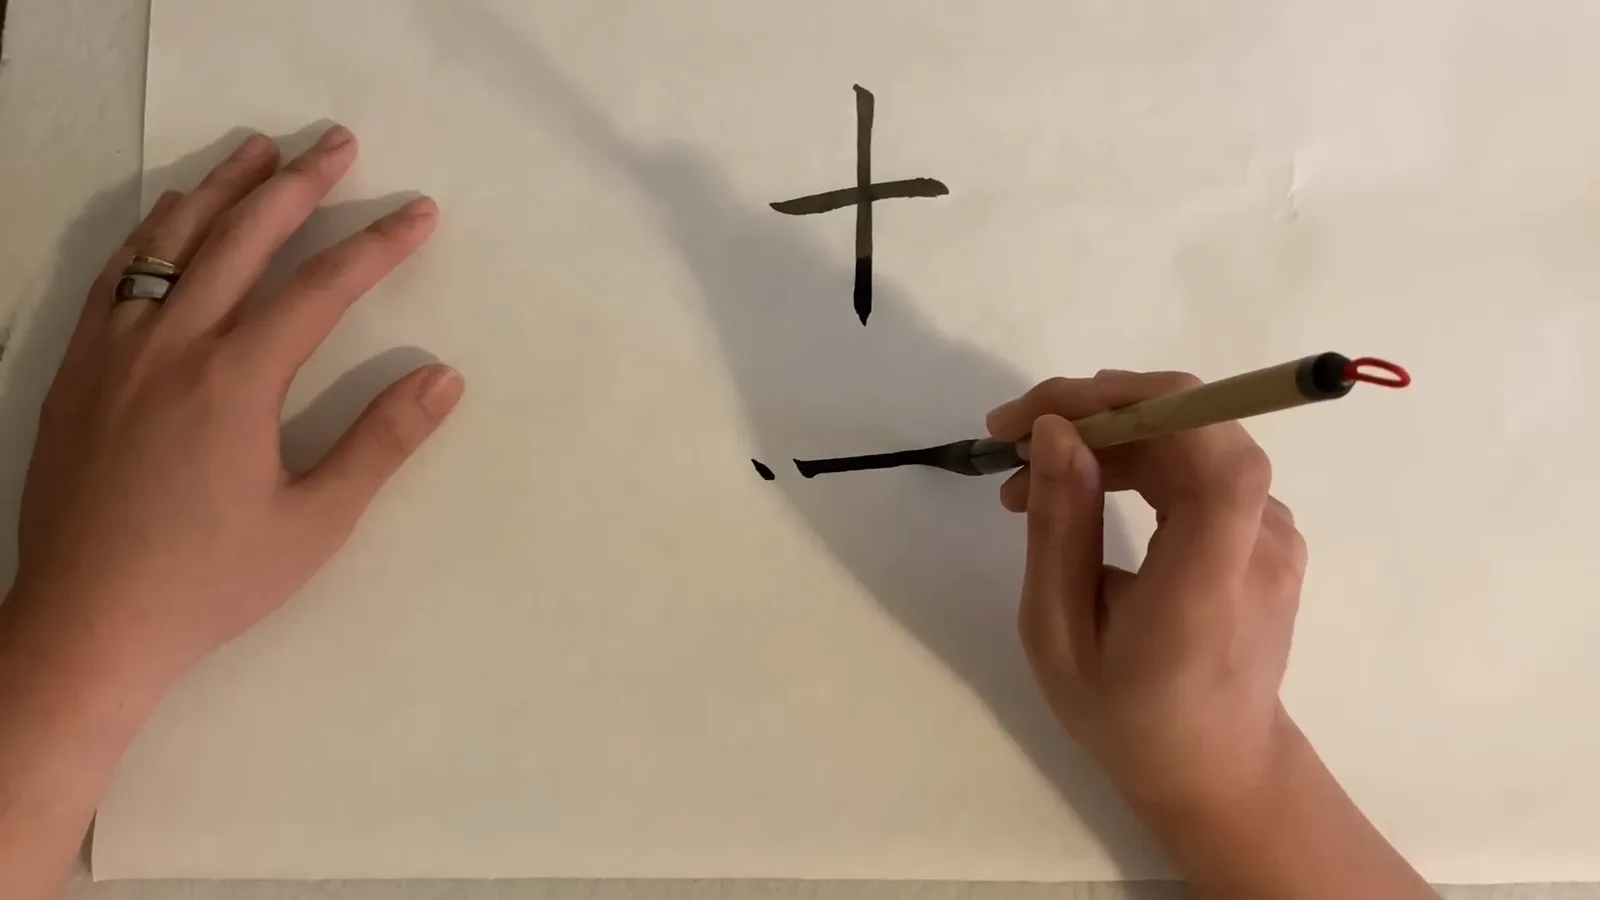
Land, drag, finish — the three pressure phases of a horizontal stroke.Watch at 5:40 - 9
The vertical stroke ends in a hanging needle
The vertical stroke has two phases: landing and dragging. Its finish differs from the horizontal — instead of a rounded hook-back, you taper the line to a sharp point called the hanging needle (xuán zhēn), pushing the tip out bit by bit at the end. Slow, gradual, and it rewards you with a crisp exit.
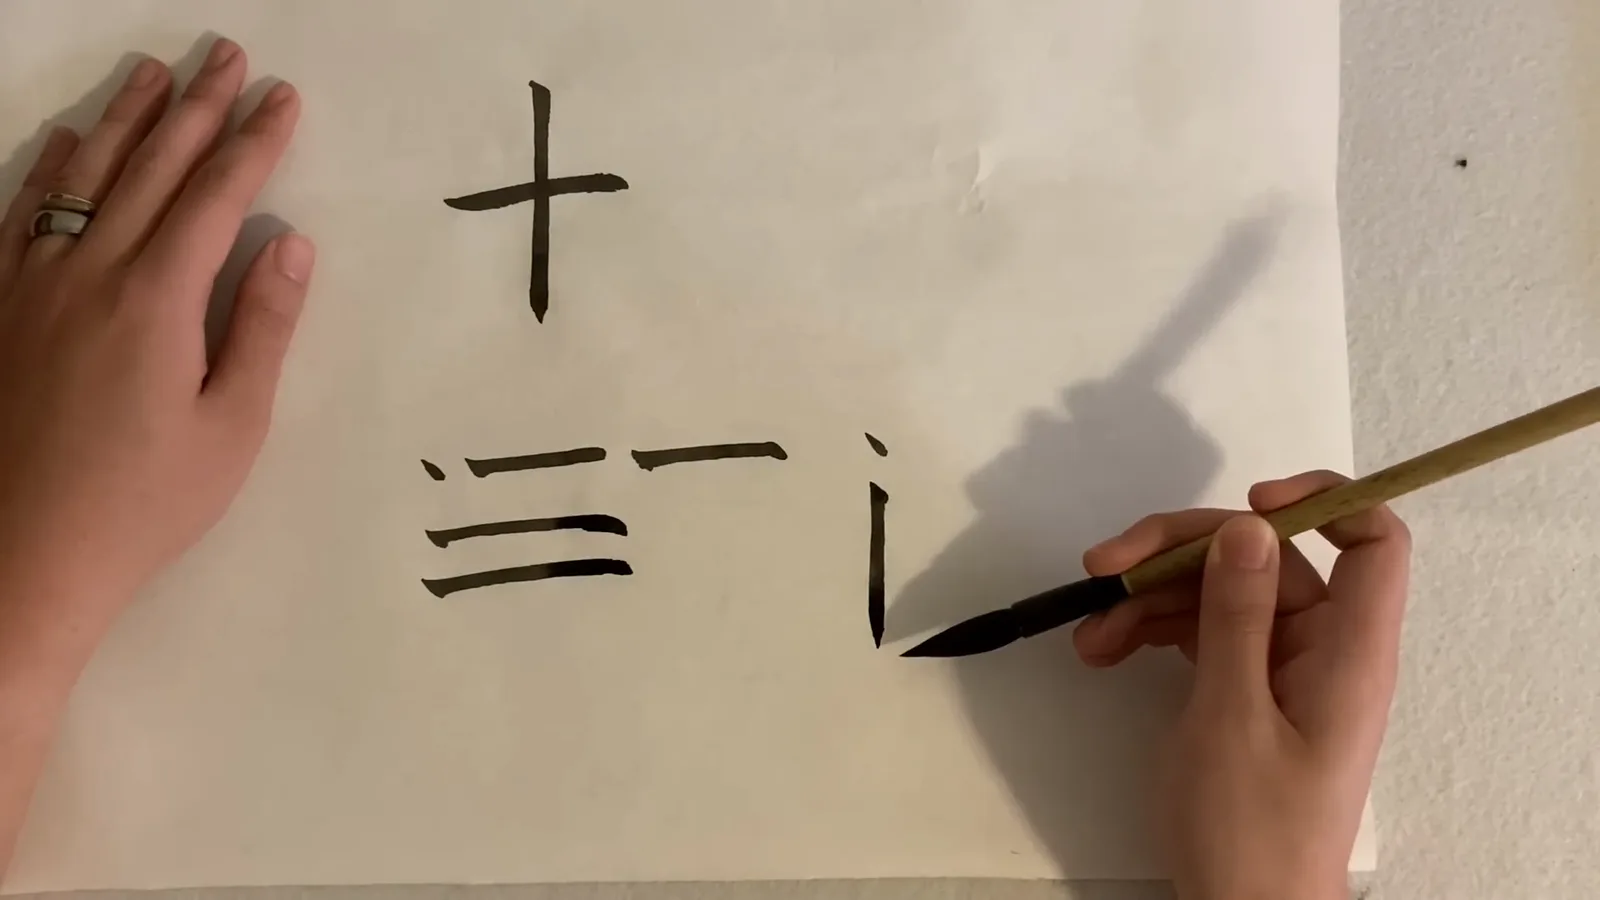
The vertical shù stroke tapers to a sharp hanging-needle tip.Watch at 7:20 - 10
Practice with shí, sān and chuān
Repeat the two strokes inside real characters: shí (ten), sān (three) for repeated horizontals, and chuān (river) for repeated verticals. In the lesson's words: once you master these two strokes it is smooth sailing — and your name written in brush ink will prove it.
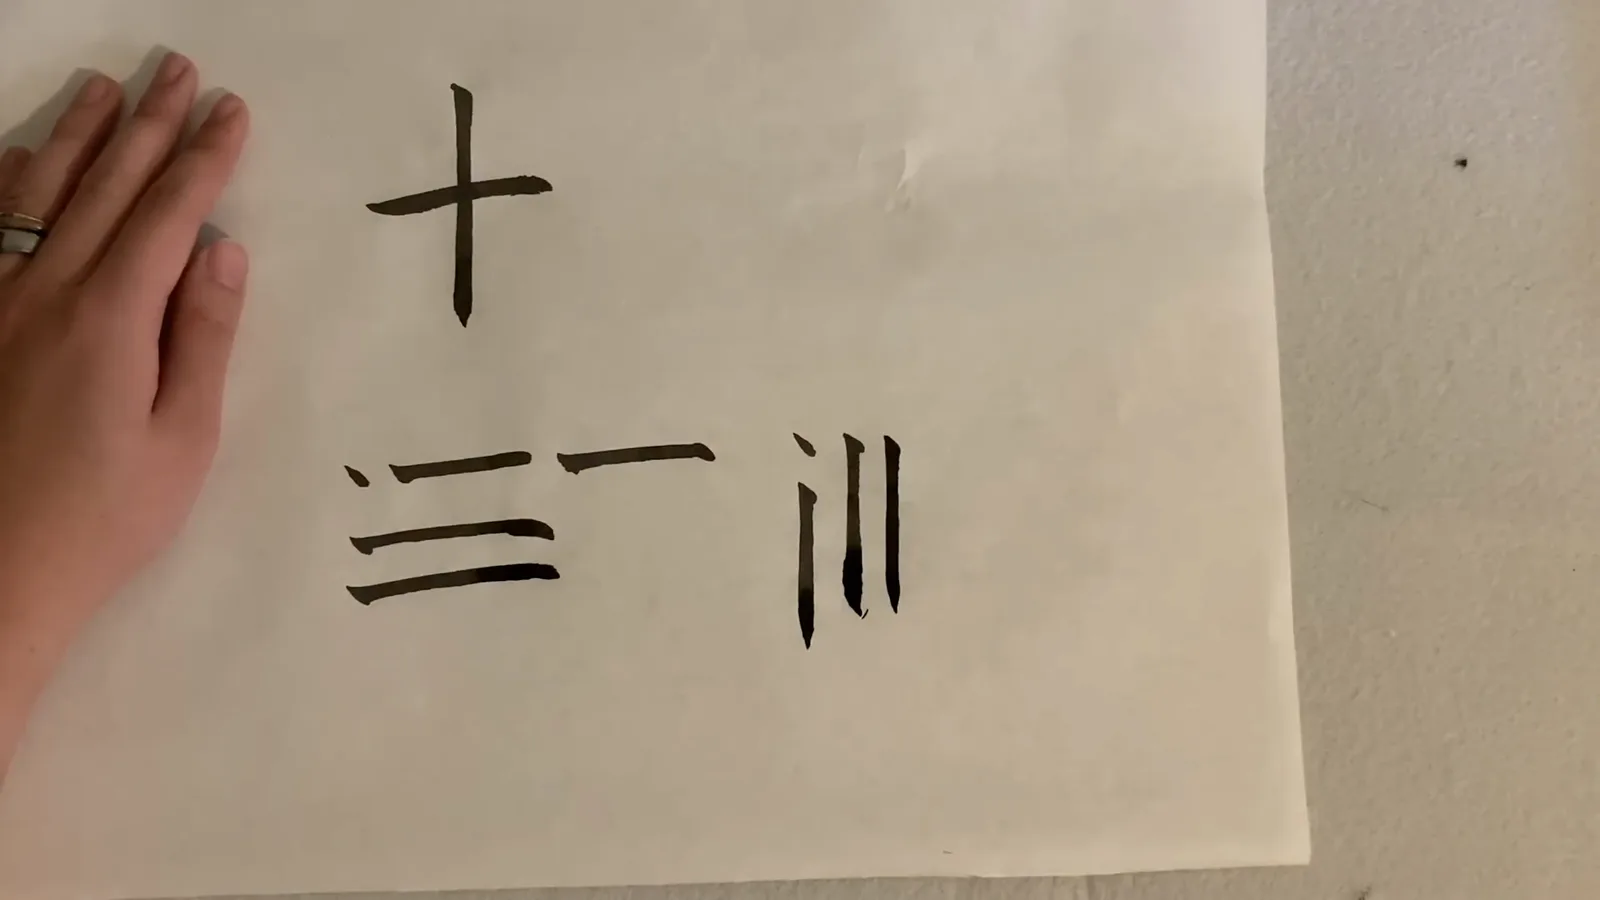
First practice characters: ten, three, and river.Watch at 8:00
Frequently asked questions
- Which fingers hold a Chinese calligraphy brush?
- The middle and ring fingers clamp the shaft from one side, the index finger and thumb press gently from the other sides, and the pinky stays close to the ring finger for support. The brush should point straight up, and the grip should be firm but never tight.
- How hard should I squeeze the brush?
- Just firmly enough that the shaft cannot twist or slip out of your fingers. A white-knuckle grip locks the wrist and makes the subtle pressure changes of the landing-dragging-finishing phases impossible.
- Why do my strokes look thick and blurry?
- You are writing with the belly of the bristles instead of the tip, or the brush is not vertical. Keep the shaft perpendicular to the paper and let only the tip touch down — fine lines are the signature of this style.
- Can I practise these strokes with my own name?
- Yes. Once shí, sān and chuān feel comfortable, look up the characters of your Chinese name and find the horizontals and verticals inside them. Generating a name first, then copying its characters stroke by stroke, is a popular way to learn.
Keep going
© 2026 AIChineseName.